Open topic with navigation
Create a New Visual Studio Project
This section will provide an opportunity to create a new Visual Studio project.
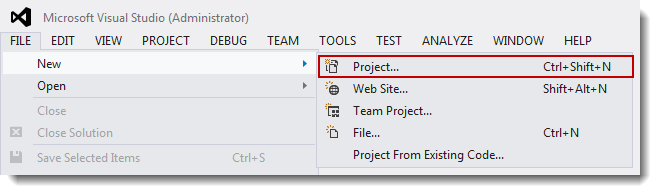
Start a new Visual Studio project:
- From the Visual Studio menu bar select File
> New > Project.
- Select Visual
C++ from the Templates list.
- Select RTX Application from the templates
area.
- This template is a single-page dialog that displays the default project settings and provides optional application and program settings. Specify the following options and libraries to include in your RTX application project:
Insert new image
- Project Type – Select C++.
- Supported String Convention – Specify Unicode or MultiByte. This determines if the associated pre-processor definitions will be included in the project settings.
- Add additional headers and libraries:
- Microsoft C Runtime Support – add C/C++ Runtime support. Most programs need support for C Runtime functions.
- Continue editing
program settings for this application. Select Provide a program framework to build a basic program
framework consisting of source and header files. When
Provide a program framework is
checked, the RTX Application template inserts
into the project C/C++ source files that contain basic program functionality
and header files that contain include and define statements.
NOTE: When Provide a program framework is un-checked, these options are grayed out.
- Select the Periodic timer thread check-box. This creates a periodic timer function shell, and inserts
a code segment into the program framework that creates and sets a periodic
timer. The user should supply the timer period, the periodic timer function
code, and exception code.
- Click Finish. This generates the RTX solution and project according
to the options you selected.
Modify the new Visual Studio project:
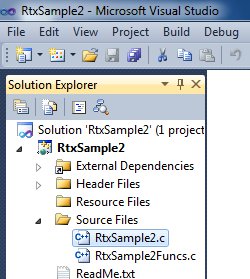
- Open the new program shell by selecting it from the list of Source Files.
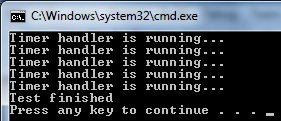
- Increase the timer period from 500 microseconds to 1 second.

- Set the test duration to 5 seconds and then display a completion message.

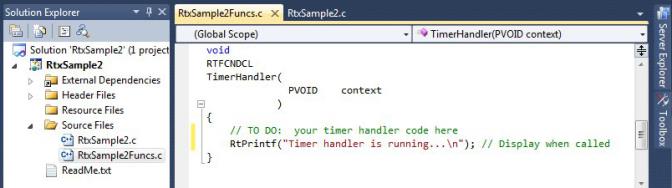
- Open the RtxSample2Funcsource file and add a line to display status when the
TimerHandler is called.
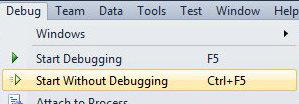
Build and run an RTX executable:
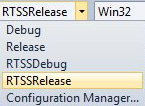
- Set the Solution Configuration so that the program will be built as an RTSSRelease executable.
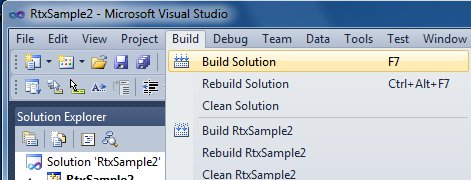
- Select Build Solution from the Build pull-down menu.

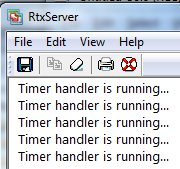
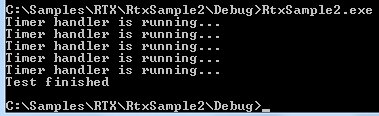
- Run the .rtss executable either by double-clicking on the file name in Explorer or by typing into a command prompt:
rtssrun RtxSample2

Build and run a Windows executable:
The sample program can also be built as a Windows executable as described below.
- Set the Solution Configuration so that the program will be built as a Windows Debug executable.
- Select Build Solution from the Build pull-down menu.
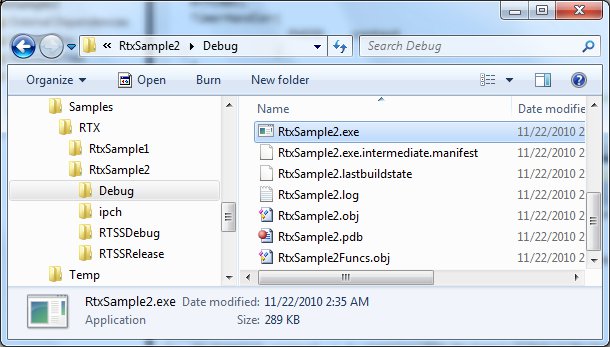
- Run the resulting Windows executable program by double-clicking the file name in Explorer or by typing the full path name into a command prompt.
- Run the Windows
.exe file from within Visual Studio.