Create and Modify a New Visual Studio Project
This section shows you how to create a new project in Visual Studio using the RTX64 Application Template, and modify the basic project framework.
Start a new Visual Studio project
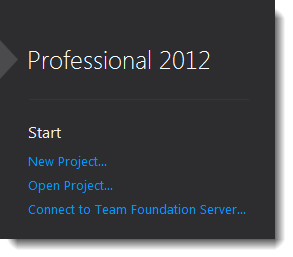
- Launch a supported version of Visual Studio.
- Create a new project: click New Project from the Visual Studio Start Page.
Select the Application Template
When you select New Project, the New Project dialog appears. In this dialog, you can select the RTX64 application template for creating an RTX application.
- Under Installed Templates, click Visual C++.
- Select the Rtx64 Application template.
- Specify the Name and Location for the new project, then click OK. In this example we will be use the name
Rtx64App1and a location ofC:\Samples\RTX64.
Configure the RTX64 Application Template
The RTX64 Application template provides basic project settings, as well as compiler and linker options. For more information, see Compiler and Linker Options.
- View the current settings, and then click Next.
- Ensure that the Microsoft C/C++ Runtime support option is selected.
- Select Periodic timer thread.
- Click Finish.
Take Note
Upon completion of the RTX64 Application template there are a few things worth noticing:
- Your project will have
x64
- RTSSDebug – Real-time application that has debug flags enabled
- RTSSRelease – Real-time application without additional debug information
- Debug – Windows 64-bit application linked to RTX64 that has debug flags enabled
- Release – Windows 64-bit application linked to RTX64
Win32
- Debug – Windows 32-bit application linked to RTX64 that has debug flags enabled
- Release – Windows 32-bit application linked to RTX64
- In the generated Header file you will see RTX64-specific header files:
- RTAPI.h – this header file is needed by both Windows application linked to RTX64 and RTSS application
- RTSSAPI.h – this header file is only needed by RTSS applications
- In the projects C/C++ settings you will see the addition of RTX64-specific paths:
- %RTX64SDKDIR<MAJORVERSION>%\include
For example, for RTX64 3.7 - version 3.7 of the RTX64 product - the path is %RTX64SDKDIR3%\include
- In the projects linker settings you will see the addition of RTX64-specific paths, preprocessor definitions, and libraries:
- Rtx64Platform macro defined to point to the correct libraries based on the platform selected, 32-bit or 64-bit.
- UNDER RTSS preprocessor definition for defining RTX64-specific functionality
- RTX64 SDK VERSION definition in RTAPI.h that can be used to check the product version
- Windows configurations:
%RTX64SDKDIR<MAJORVERSION>%\lib\$(Rtx64Platform) - additional path for the RTX64 libraries
For example, for RTX64 3.7 - version 3.7 of the RTX64 product - the path is %RTX64SDKDIR3%\lib\$(Rtx64Platform)
rtapi.lib – library that provides Windows application with the ability to interact with RTSS processes
- RTSS Configurations:
%RTX64SDKDIR<MAJORVERSION>%\lib\$(Rtx64Platform) – additional path for the RTX64 libraries
Startup.lib or StartupCRT.lib – libraries used of RTX64 startup functionality
Rtx_rtss.lib – library that provides RTX64 support and functionality
- In the project's Build events and Post-build events you will see an event for StampTool. This step is executed to license all binaries created so they can run on a target system with a valid RTSS subsystem.
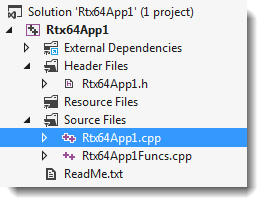
The new project contains a basic program framework consisting of source and header files, as well as additional elements for a Periodic timer thread. Once the project has been created, you can modify the program source code.
- Open the new program shell by selecting it from the list of Source Files.
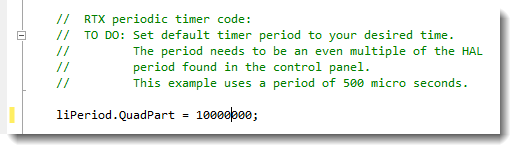
- For the first modification, increase the timer period from 500 microseconds to 1 second.
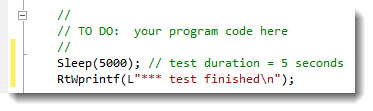
- Next, set the test duration to 5 seconds and then display a completion message.
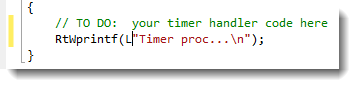
- Open the Rtx64App1Funcs.cpp file for the RTX64 application and add a line to display status when the
TimerHandleris called.
Build and run a RTX64 executable
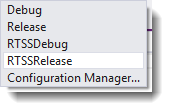
- Set the Solution Configuration so that the program will be built as an RTSSRelease executable.
- Select Build Solution from the Build pull-down menu.
-
If your development system also contains a RTX64 Runtime, you can run the .rtss executable either by double-clicking on the file name in Explorer or by typing it into a command prompt:
rtssrun C:\Samples\RTX64\x64\RTSSRelease\Rtx64App1.rtss
If your Runtime is located on a different system, you will need to copy the binary to that system first.
Build and run a Windows executable
The sample program can also be built as a Windows executable as described below.
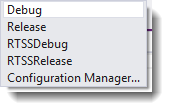
- Set the Solution Configuration so that the program will be built as a 64-bit Windows Release executable.
- Select Build Solution from the Build pull-down menu.
-
If your development system also contains an RTX64 Runtime, you can run the resulting Windows executable program by double-clicking the file name in Explorer or by typing the full path name into a command prompt. If your Runtime is located on a different system, you will need to copy the binary to that system first.
