You can associate monitor events with session triggers on the Events and session triggers page in wRTOS Monitor to start and/or stop event collection automatically.
In this section:
- About Session Triggers
- Creating a Session Trigger
- Creating a Session Trigger for Custom Events
- Understanding Session Trigger Indicators
- Deleting Session Triggers
About Session Triggers
wRTOS Monitor supports two types of session triggers:
- A start trigger automatically starts event collection when its associated event occurs in your real-time application.
- A stop trigger automatically stops event collection when its associated event occurs in your real-time application.
Start and stop trigger options will either be active or grayed-out depending on the current monitoring status.
| Status | In this state, you can... |
|---|---|
| Not enabled |
Session triggers cannot be changed |
| Enabled |
Create, set, and delete start and stop triggers for the next session |
| Running |
Create, set, and delete stop triggers for the current session Note: Start triggers cannot be added, set, or deleted while a session is running. |
| Paused |
Create, set, and delete start and stop triggers for the next session |
Note: The above states assume the Subsystem is started. When the Subsystem is not started, all functionality on the Events and session triggers page is grayed-out.
Creating a Session Trigger
You can create a trigger from a collected event or event group by dragging that event/group from the Choose events to collect tree into either the start trigger (to create a start trigger) or stop trigger (to create a stop trigger) section.
Note: Only events selected to be collected in the Choose events to collect tree can be used as trigger events.
Note: Only stop triggers can be configured when a monitoring session is running. Start trigger functionality is grayed-out while monitoring is in the Running state. See Understanding Monitor Status for more information.
To create a session trigger for a single event:
- Under Choose events to collect, click and hold the event you want to create a trigger from.
- Do one of the following:
- To create a start trigger for that event, drag-and-drop the event into the start trigger section.
- To create a stop trigger for that event, drag-and-drop the event into the stop trigger section.
In this example, the Critical Section Enter event was dragged-and-dropped into the start trigger section, creating a start trigger for that event:
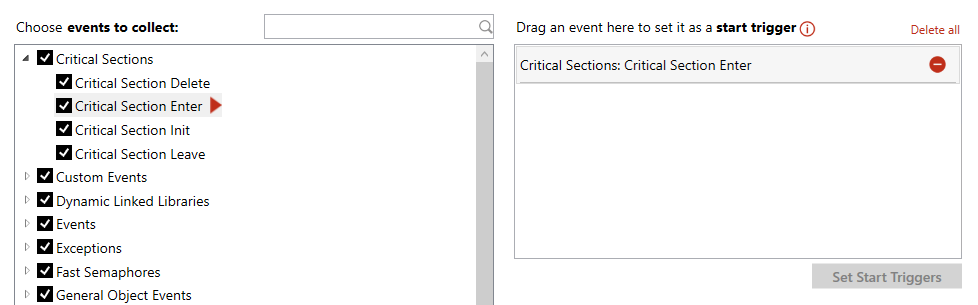
- Click Set Start Triggers to apply the new trigger for the next monitoring session.
Note: A new session may start immediately depending on the events selected.
To create session triggers for all events in a group:
- Under Choose events to collect, click and hold the event group name whose events you want to create triggers from.
- Do one of the following:
- To create start triggers for the events in that group, drag-and-drop the event group into the start trigger section.
- To create stop triggers for the events in that group, drag-and-drop the event group into the stop trigger section.
In this example, the Critical Sections event group was dragged-and-dropped into the start trigger section, creating start triggers for all events in that group:
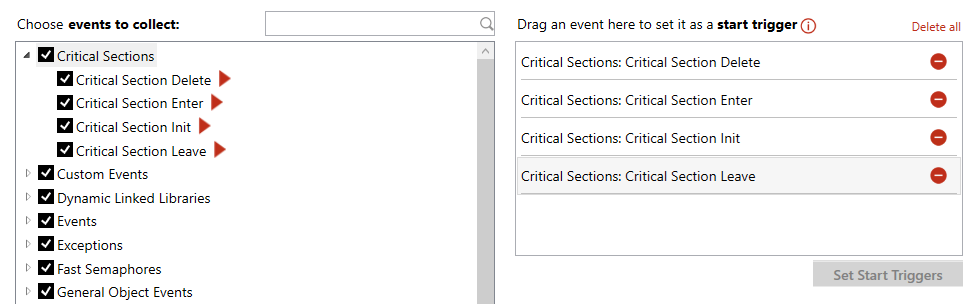
- Click Set Start Triggers to apply the new triggers for the next monitoring session.
Note: A new session may start immediately depending on the events selected.
Note: Clearing selection of an event group in the Choose events to collect tree will cause any triggers associated with the events in that group to become non-functional.
Creating a Session Trigger for Custom Events
You can create a trigger for all custom events or for a single custom event ID that you specify.
To create a session trigger for all custom events:
- Under Choose events to collect, click and hold the Custom Events group name.
- Do one of the following:
- To create start triggers for all custom events, drag-and-drop the Custom Events group into the start trigger section.
- To create stop triggers for all custom events, drag-and-drop the Custom Events group into the stop trigger section.
In this example, the Custom Events group was dragged-and-dropped into the start trigger section. This created a Custom Events: All start trigger that will execute whenever a custom event occurs in the application:
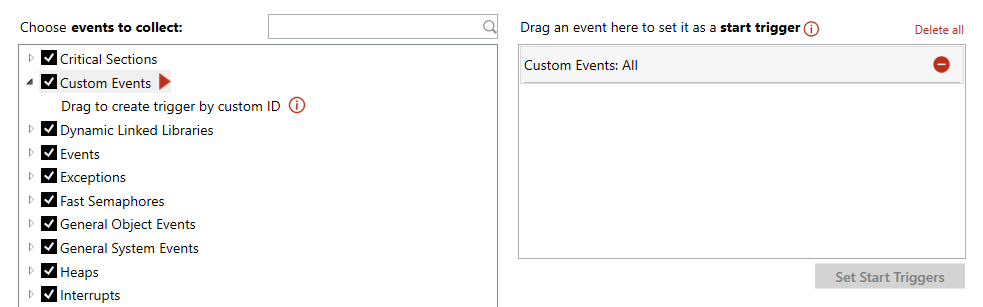
Note: The Custom Events group trigger will replace any individual Custom Event ID triggers (see To create a trigger for a single Custom Event ID below) that exist for that trigger type (start or stop).
- Click Set Start Triggers to apply the new trigger for the next monitoring session.
Note: A new session may start immediately depending on the events selected.
To create a trigger for a single Custom Event ID:
- Under Choose events to collect, expand the Custom Events group.
- Click and hold the Drag to create trigger by custom ID.
- Do one of the following:
- To create a start trigger for a custom event ID, drag-and-drop Drag to create trigger by custom ID into the start trigger section.
- To create a stop trigger for a custom event ID, drag-and-drop Drag to create trigger by custom ID into the stop trigger section.
Note: You cannot create a Custom Event ID trigger if a Custom Events: All trigger already exists for that trigger type (start or stop).
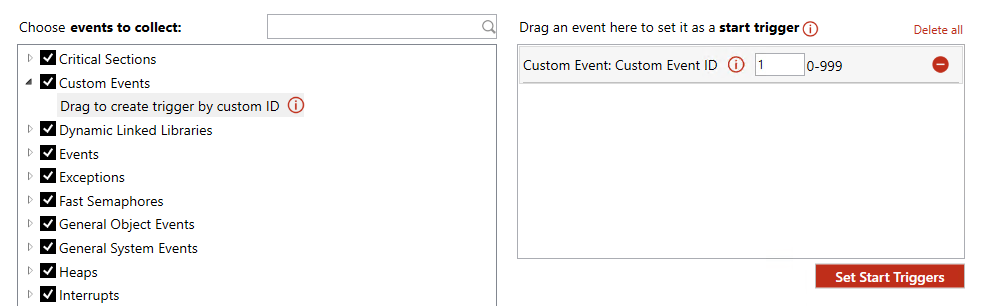
- Enter the ID (0-999, inclusive) of the custom event you want to create a trigger from. This ID corresponds to parameter kind in API RtGenerateEvent, which is used to generate custom events.
In this example, Drag to create trigger by custom ID was dragged-and-dropped into the start trigger section, and a custom ID of 1 was entered. This created a Custom Event: Custom Event ID start trigger that will execute whenever the custom event that corresponds with the value 1 occurs in the application:
- Click Set Start Triggers to apply the new trigger for the next monitoring session.
Note: A new session may start immediately depending on the events selected.
Understanding Session Trigger Indicators
The Choose events to collect tree uses icons to indicate events that are associated with a start and/or stop trigger that has been set.
| Icon | Meaning |
|---|---|
|
|
The event is associated with a start trigger that has been set. |
|
|
The event is associated with a stop trigger that has been set. |
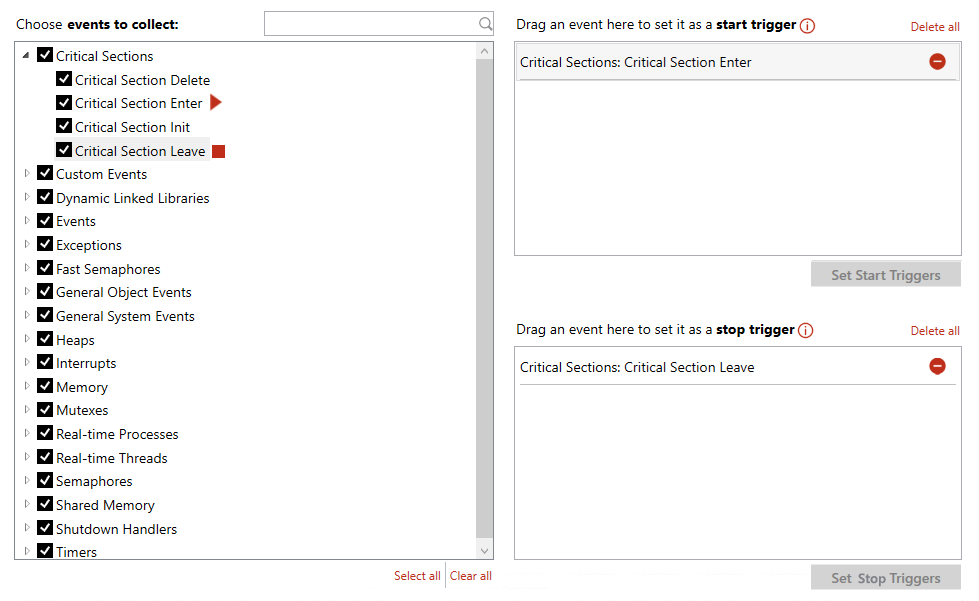
In this example, a start trigger is associated with the Critical Section Enter event, and a stop trigger is associated with the Critical Section Leave event. These trigger associations are indicated by the start and stop icons, respectively, in the tree:
Deleting Session Triggers
There are a few methods you can use to delete session triggers.
To delete a single session trigger:
- Select the session trigger you want to delete, and then click the Delete icon.
![]()
To delete all session triggers of a type:
To delete all start triggers:
- Click Delete all above the start trigger section.
- In the confirmation dialog, click Delete All.
To delete all stop triggers:
- Click Delete all above the stop trigger section.
- In the confirmation dialog, click Delete All.
Other Topics in this section:
- Using wRTOS Monitor
- Understanding Monitor Status
- Starting, Pausing, and Stopping a Monitor Session
- Customizing Event Collection
- Session Options
Related Topics:
