On the Core Configuration page in wRTOS Settings, you can view the total system cores available, set or change the RTSS configuration, and view the core assignments for wRTOS processes and components. When wRTOS Runtime is installed, you can assign available processors to Windows or wRTOS.
Note: Some changes to wRTOS Settings require a restart of the Subsystem. When the Subsystem needs to be restarted, a prompt will appear in the wRTOS Settings footer. Changes to settings on this page may also require a restart of the system.
In this section:
- Cores Overview
- Set or Change the RTSS Configuration
- RTSS Configuration Validation
- Core Assignments for wRTOS Processes and Components
![]() Accessing Core Configuration Settings
Accessing Core Configuration Settings
Cores Overview
The Core Configuration page provides an overview of system cores, including the total cores available, the number of cores assigned to Windows cores, and the number of cores assigned to the wRTOS Real-time Subsystem (RTSS).

| Label | Meaning | Notes |
|---|---|---|
|
Total cores available |
The total number of system cores that can be assigned between Windows and the wRTOS Real-time Subsystem (RTSS). wRTOS Settings also displays the Hyper-Threading status here. |
For optimal performance, we recommend turning Hyper-Threading off. When Hyper-Threading is enabled, avoid splitting two logical cores that use the same physical core between Windows and RTSS, as this could negatively impact determinism on the RTSS logical core. |
|
Current Windows cores |
The number of cores assigned to Windows. If an RTSS configuration has not been set, this value will match the total number of cores available. If your system uses an Intel® processor that supports a Performance Hybrid Architecture combining Performance-cores (P-cores) with Efficient-cores (E-cores), wRTOS Settings displays the number of P-cores and E-cores assigned to Windows. |
For more information, see Using wRTOS on a Performance Hybrid Architecture. |
|
Current RTSS cores |
The number of cores assigned to the wRTOS Real-time Subsystem (RTSS). If an RTSS configuration is not set, this will be 0. If your system uses an Intel® processor that supports a Performance Hybrid Architecture combining Performance-cores (P-cores) with Efficient-cores (E-cores), wRTOS Settings displays the number of P-cores and E-cores assigned to the wRTOS Real-time Subsystem (RTSS). |
For more information, see Using wRTOS on a Performance Hybrid Architecture. |
Set or Change the RTSS Configuration
When wRTOS Runtime is installed and licensed, you can assign available system processors between Windows and the wRTOS Real-time Subsystem (RTSS). This creates a wRTOS boot configuration.
Note: We recommend disabling Hyper-Threading. When Hyper-Threading is enabled, avoid splitting two logical cores that use the same physical core between Windows and RTSS, as this could negatively impact determinism on the RTSS logical core.
To set or change the RTSS configuration:
- View the number of total cores available at the top of the Core Configuration page. This is the number of cores you can assign between Windows and wRTOS. Keep in mind that at least the first core is always assigned to Windows. For example, on a machine with 8 cores, and a Professional wRTOS Runtime license at minimum, you can assign up to 7 cores to wRTOS.
- Assign system cores to Windows. Enter a value or choose a number from the Windows combo box.
- Assign remaining cores to the wRTOS Real-time Subsystem (RTSS). Enter a value or choose a number from the RTSS combo box.
- If the specified configuration is valid, click Apply to complete the configuration.
Note: The Apply button is grayed-out until a valid configuration is provided. A valid configuration meets these requirements:
• The total number of cores assigned to Windows and RTSS is equal to or less than the total number of system cores.
• The number of cores assigned to RTSS is equal to or less than the number of cores allowed by your wRTOS Runtime Edition license.
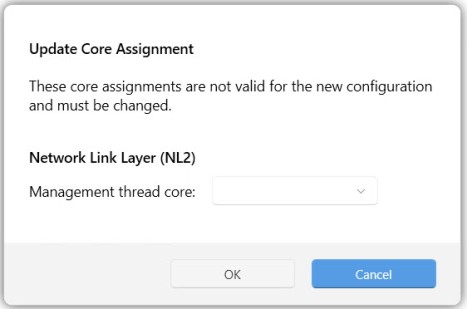
Note: When a new core configuration invalidates existing core assignments, the Update core assignment dialog appears. This dialog displays the wRTOS Settings core assignments that must be updated based on the new core configuration. Update the core assignments and then click OK. Changes to the core assignments in this dialog are automatically applied to the wRTOS Settings pages where the core assignment settings reside.
- Restart the system. Choose the wRTOS boot configuration when the system starts.
Note: If you change the number of cores assigned to Windows, you must reboot the system to reallocate cores between Windows and RTSS. If you change the number of RTSS cores after an RTSS configuration is applied, you only need to restart the wRTOS Subsystem. The Subsystem will use the old configuration until you restart it.
Setting the RTSS Configuration from a Command Line
You can also set the RTSS configuration from a command line, using the MaxRTActivationUtil utility.
To set or change the RTSS configuration from a command line:
- Navigate to
%wRTOSCommon%\bin. - Open a Windows command prompt with Administrator permissions.
- Enter the number of Windows
-wand RTSS-rprocessors.
For example, to assign 3 processors to Windows and 5 processors to RTSS, you would type:
MaxRTActivationUtil.exe -w 3 -r 5
- Restart the system. Choose the wRTOS boot configuration when the system starts.
Core Assignments for wRTOS Processes and Components
Once system cores are assigned to wRTOS in an RTSS boot configuration (see above), wRTOS Settings displays the default core assignment(s) used by wRTOS processes and licensed components, such as the Network Link Layer (NL2), Network Relay, and E-CAT.
For example:
To change the default core for processes:
Enter a number or choose a value from the Change the default core combo box.
The Network Link Layer (NL2) uses cores 6, 7, and 8
To change the core(s) use by licensed components:
You can change default core assignments on the respective wRTOS Settings pages. For example, to change the core(s) used by the NL2, change the Management thread core on the Network Link Layer (NL2) page.
